Your Cart is Empty


Find our notes on setting up your Dual Indicator at the end... Sighting in a Black Gold sight should be easy, but for some it can be confusing. Hopefully we can make this simple. If you prefer the video instructions, you can find it here!
These steps are specifically for the Black Gold Ascent Verdict, Mountain Lite, Whitetail, and Pro sights but can be applied to other brand sights as well. For the sake of time and focus we’re going to assume that your bow has a tuned rest, and a d-loop and peep installed. It’s important that these are installed to fit YOU. If not, get your bow to a local pro shop and have them fit your bow to your draw.

Here are a few items that you will need:

Setting the default (or zero) position of your Black Gold sight at the top of the dial is common. While this will work with a single indicator, it will also limit the range of your yardage adjustment. If you set your default to the top, you will only be able to dial in yardages past your floater pin. If instead you set your default position to “flush” you’ll be able to dial in exact yardages closer and further than your floater.

Flush is simply the top of the sight rack lining up with the top of the tape bar. See images above. Also if you move the sight knob through its range, you'll notice that there is a natural resting position where the bars are flush making it easy to find even in the dark.


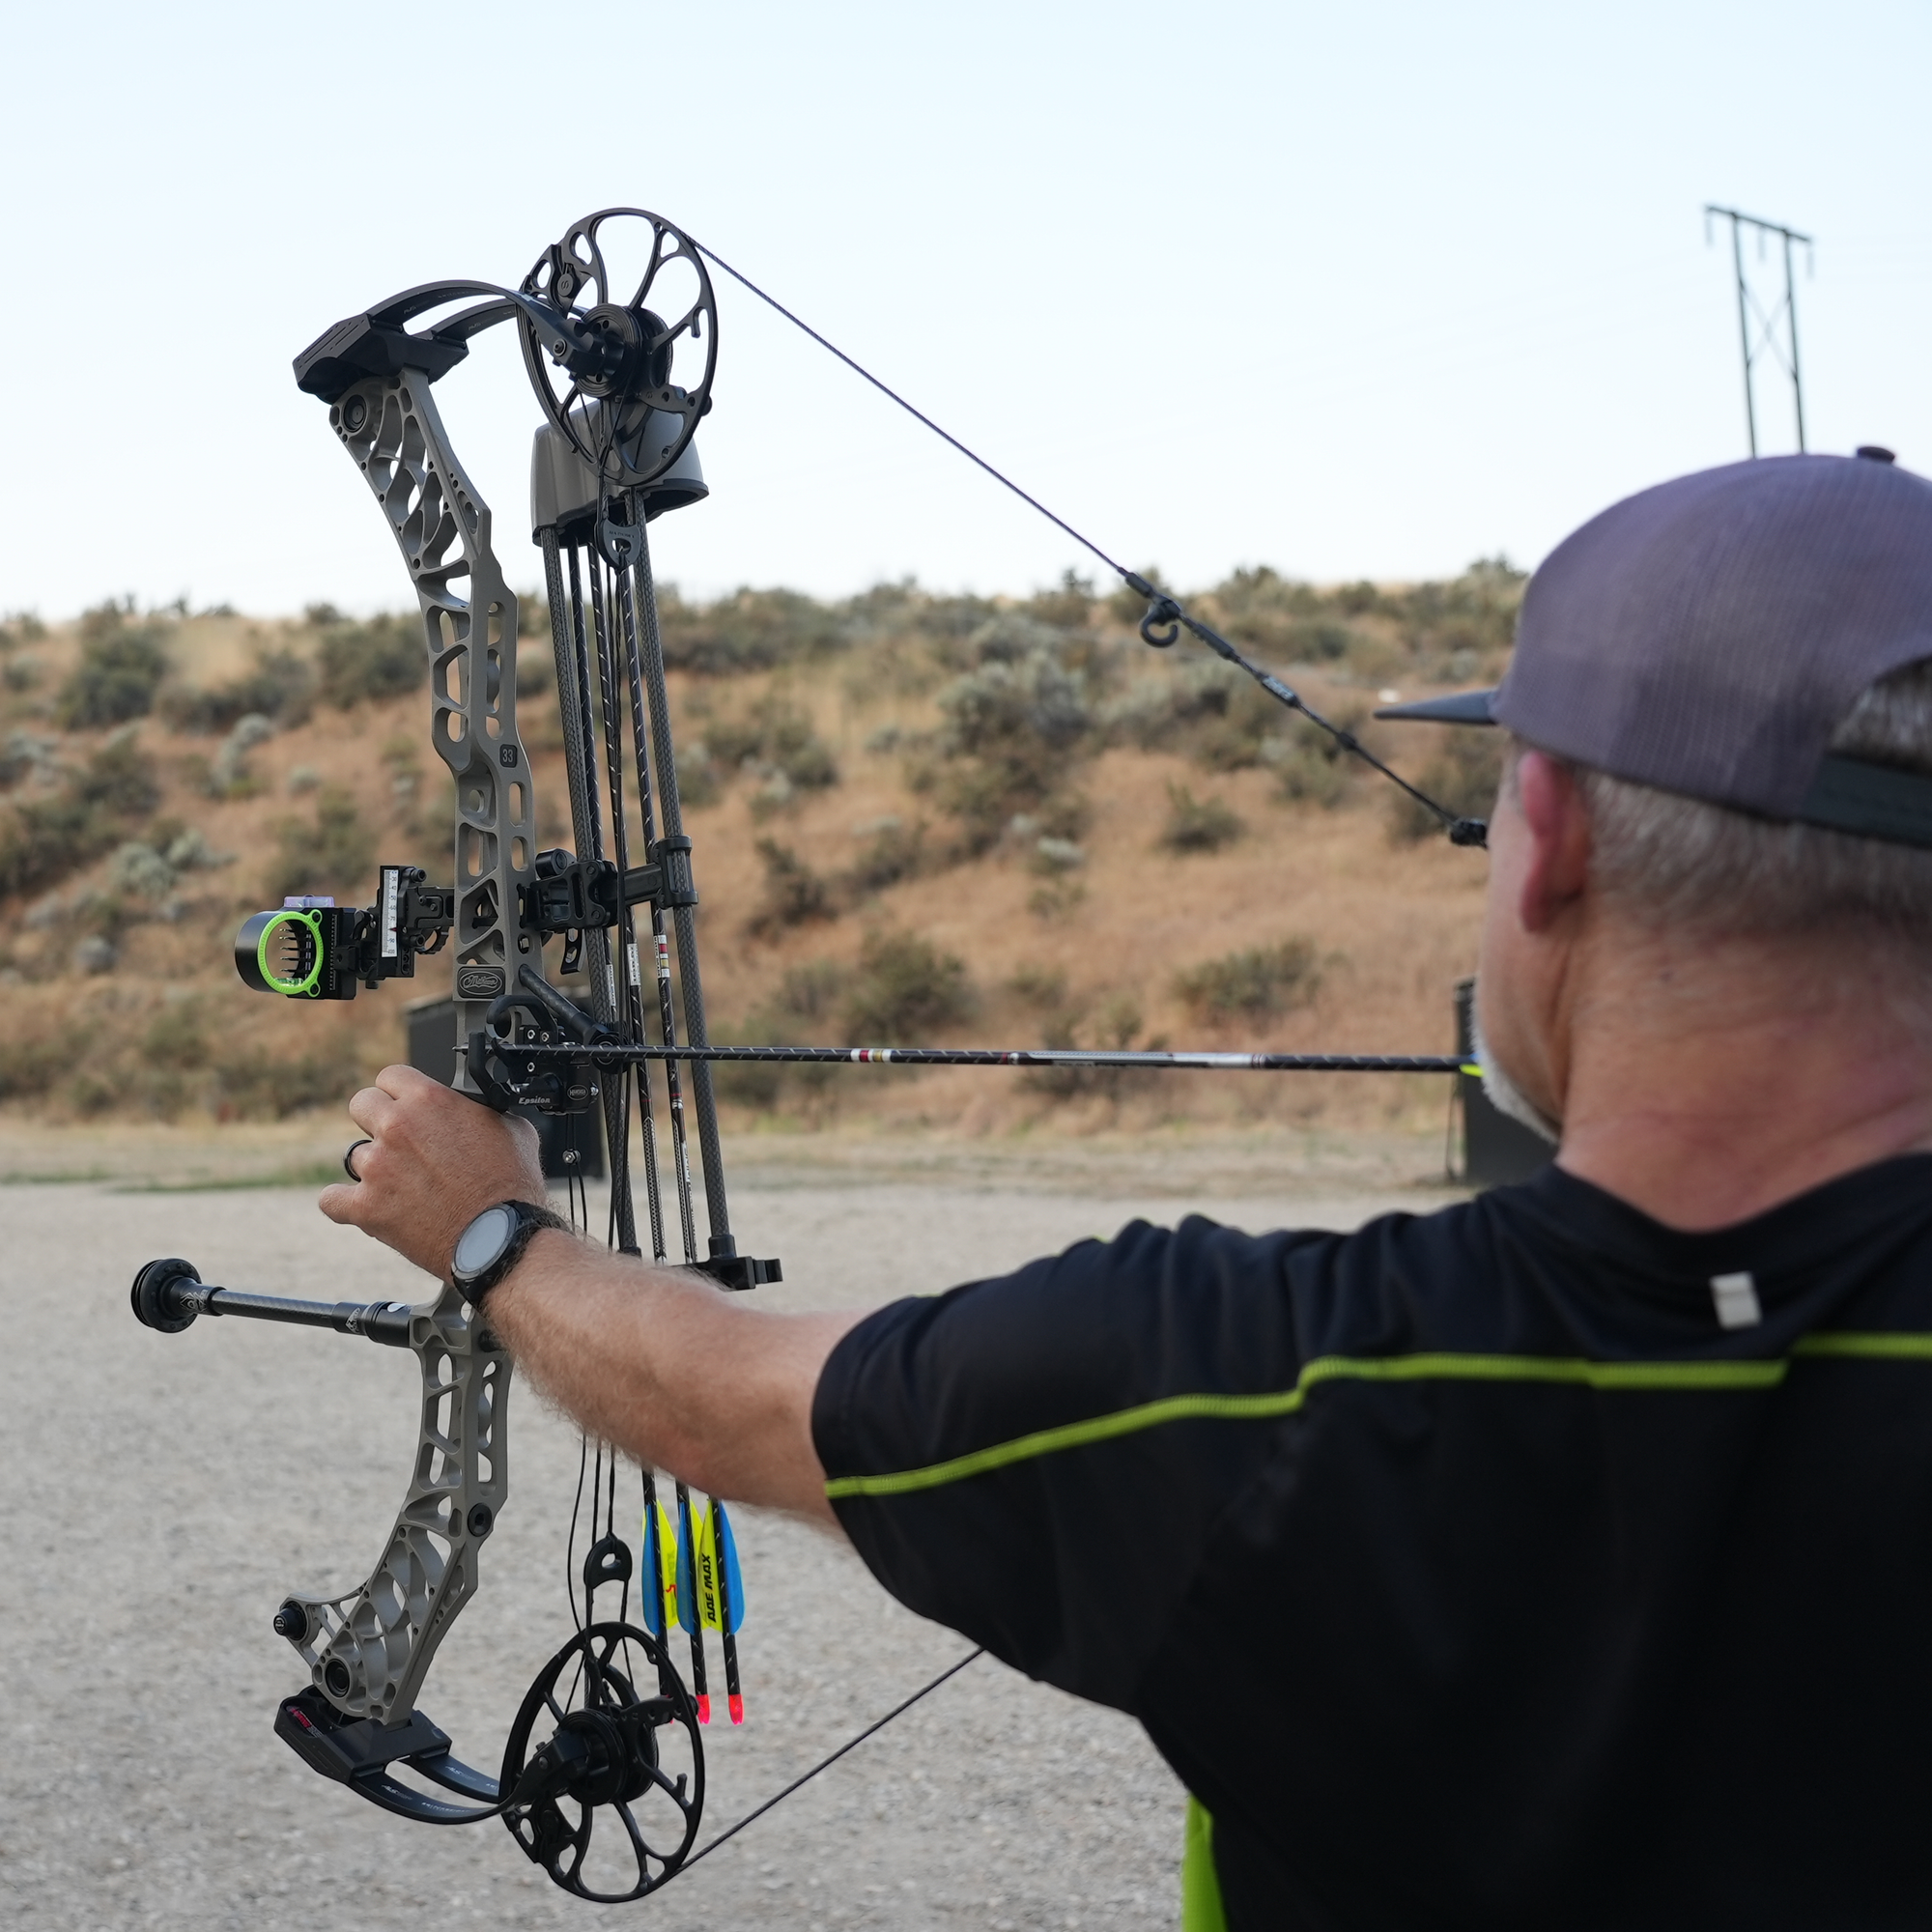
Lastly we have to set the 3rd axis. An accurate 3rd axis is important if you are going to be taking angled shots past 30 or 40 yards. If your 3rd axis is off, your bubble will lie and tell you that your need to cant your bow to the left or right, causing you to miss left or right of your target. Because we all grip our bows differently, it's important that this be done by YOU at full draw.

 3rd Axis Set Screw
The easiest way to correct your 3rd axis alignment on a multi pin sight is to come to full draw, aim up at a 45 degree angle with your pins lined up to a corner in your house (or garage if your wife is like mine). Your bubble should stay centered while your pins are perfectly in line with the corner. If so, then your 3rd axis is on. Otherwise make very small adjustments to your 3rd axis until the bubble stays centered. On a black Gold sight this is done by loosening the 3rd axis set screw (smaller screw on the shooter side of the base) and making small turns (1/8th turn) left or right on the 3rd axis adjustment screw (larger screw on the non-shooter side) to correct the bubble till its level. If you have a single pin sight, you'll need to tape a string with a weight at the end to the top of your housing and let it hang down in front of your pin. Make sure it is centered on the housing. While at full draw, aim at a 45 degree angle up, keeping your pin in line with the string. Check your bubble. If it needs adjustment, make the changes as described above.
 Red=Vertical Gang Adjustment Yellow=Horizontal Gang Adjustment
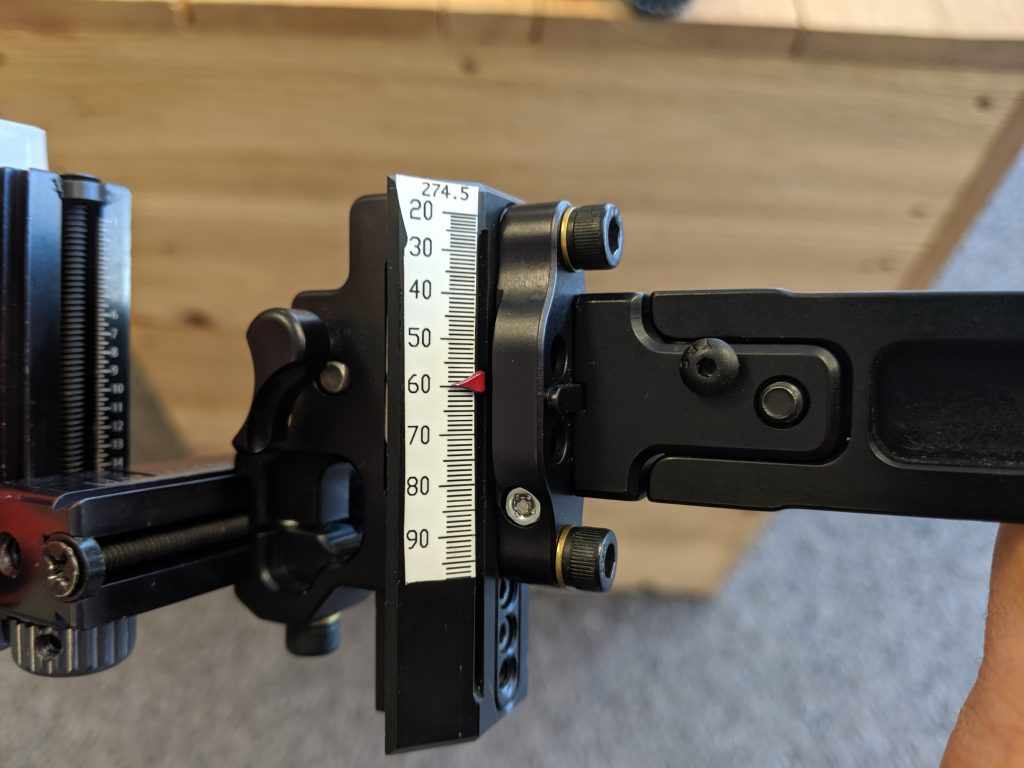
 Top pin @ 20 yards, and the same pin at 60 yards
Once your top pin is good (need more left?), make a mark with a pencil on your sight tape bar where red pointer is. Then turn the yardage adjustment down so that it moves the same top pin far enough down to be accurate at 60 yards. Using the yardage knob only, sight in your top pin so that it is accurately hitting at 60 yards. Windage is not super important right now. Once your top pin is consistently hitting the target at 60 yards, put another pencil mark on your yardage tape bar at the red pointer. Using your included sight tapes, compare the two pencil marks against the different sight tapes, lining up the 20 and 60 yard marks. If your top pin is 30 yards, compare the 30 yard and 60 yard marks. It will be obvious which sight tape matches your configuration. When placing the sight tape on your bar, make sure you move your sight back to its default position where your top pin is set for 20 yards.

Sight in the rest of your pins, take your time on this. I personally shoot 3 arrow groups before I make a change. You may notice that at farther distances you need to make windage adjustments. Do so with your horizontal gang adjustment. And be sure to make small changes based on groups, not individual shots.
Starting in 2020 Black Gold has included a Dual Indicator option. All Black Gold adjustable sights built from November 2019 and newer have the option for their dual indicator system. This allows you to have 2 pointers on the tape. You can configure the pointers to be configured for which ever pins you want to use. My recommendation is to track the middle pin and the bottom pin. I feel like this gives you the most flexibility across yardages, but still gives you the option for accuracy using that middle pin. At this point you should already have your bottom pointer assigned to your bottom pin if you followed my recommendation. (60 yard pin assigned to your bottom indicator pointing at 60 yards on the tape) Now is the time where you can be creative. I personally line up my top red indicator to my middle pin, but you can use this pointer to track what ever pin you want. So this top indicator will be pointing at 40 yards on the tape, and will follow my 40 yard or middle pin.
Now that you have the knowledge, and the confidence of setting up your own sight, shoot as often as possible. The more you shoot, the more you'll dial in your sight and the more confidence you'll gain. Nothing is more valuable than having confidence in yourself and your gear. Bow hunting is hard enough, stack the odds in your favor!
Still need help? Check out our YouTube Video for easy instructions!